Quickstart guide
Build a Simple To-Do List App
Step 1: Create a New Project
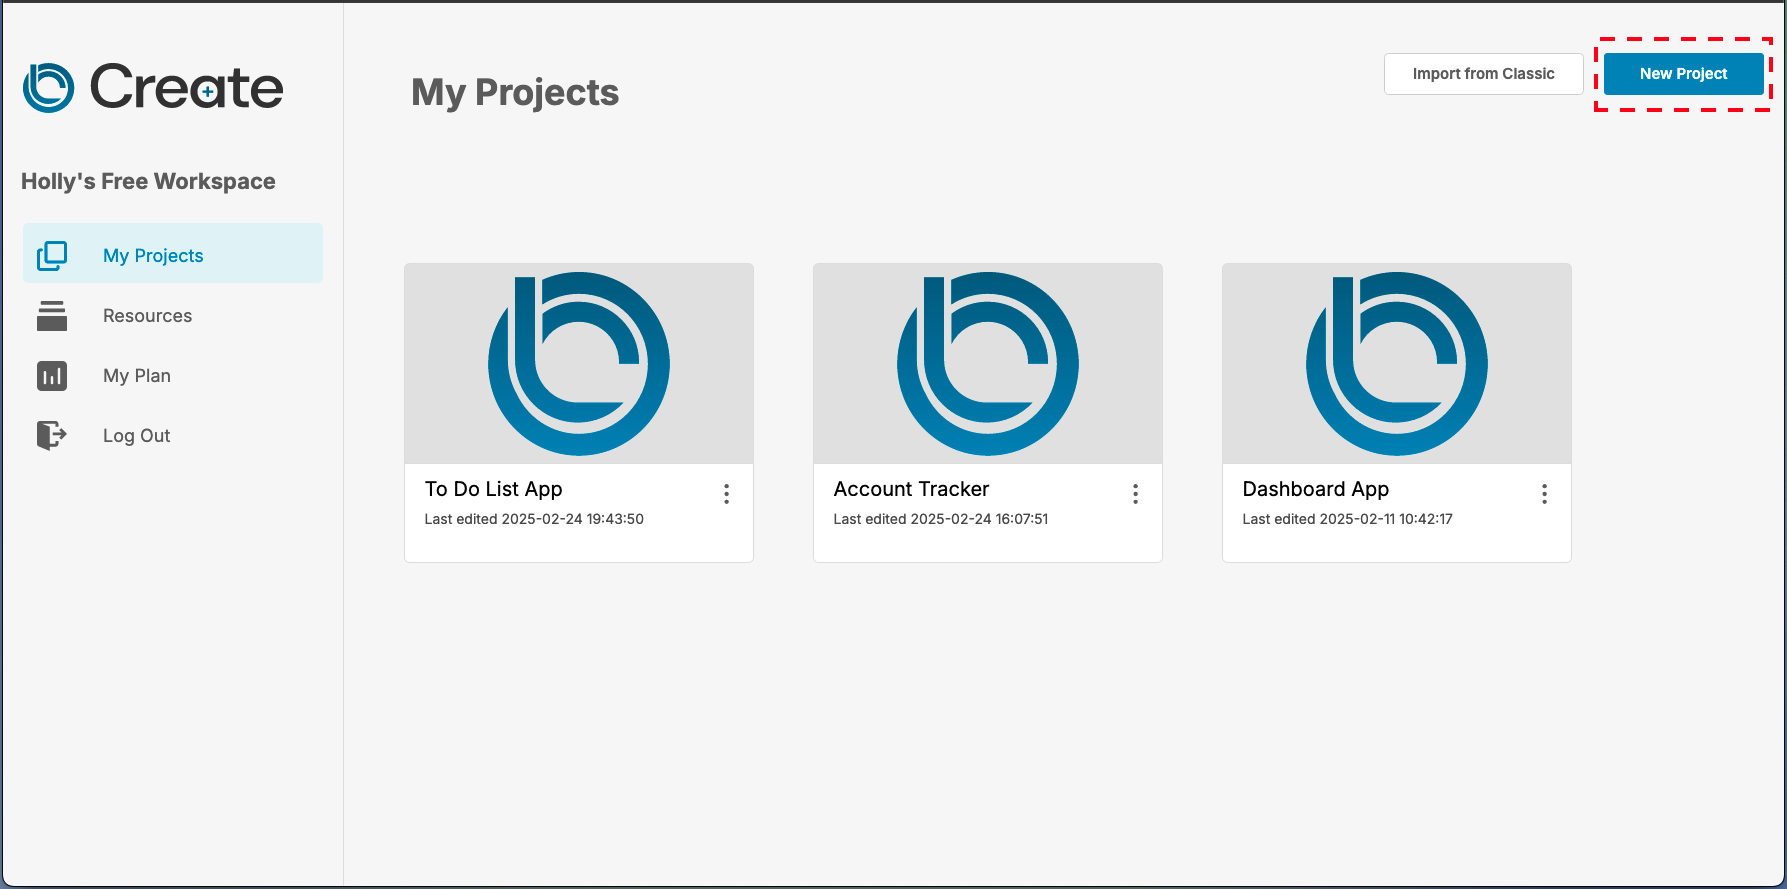
- Open LiveCode Create and click Create New Project on the dashboard.
- Enter a name for your project (e.g., "To-Do List") and click Create.
This will create your new project and take you to the App Building Environment. Each new project contains 1 layout when it is created, which you will see in the Canvas Area.
Step 2: Design the Layout
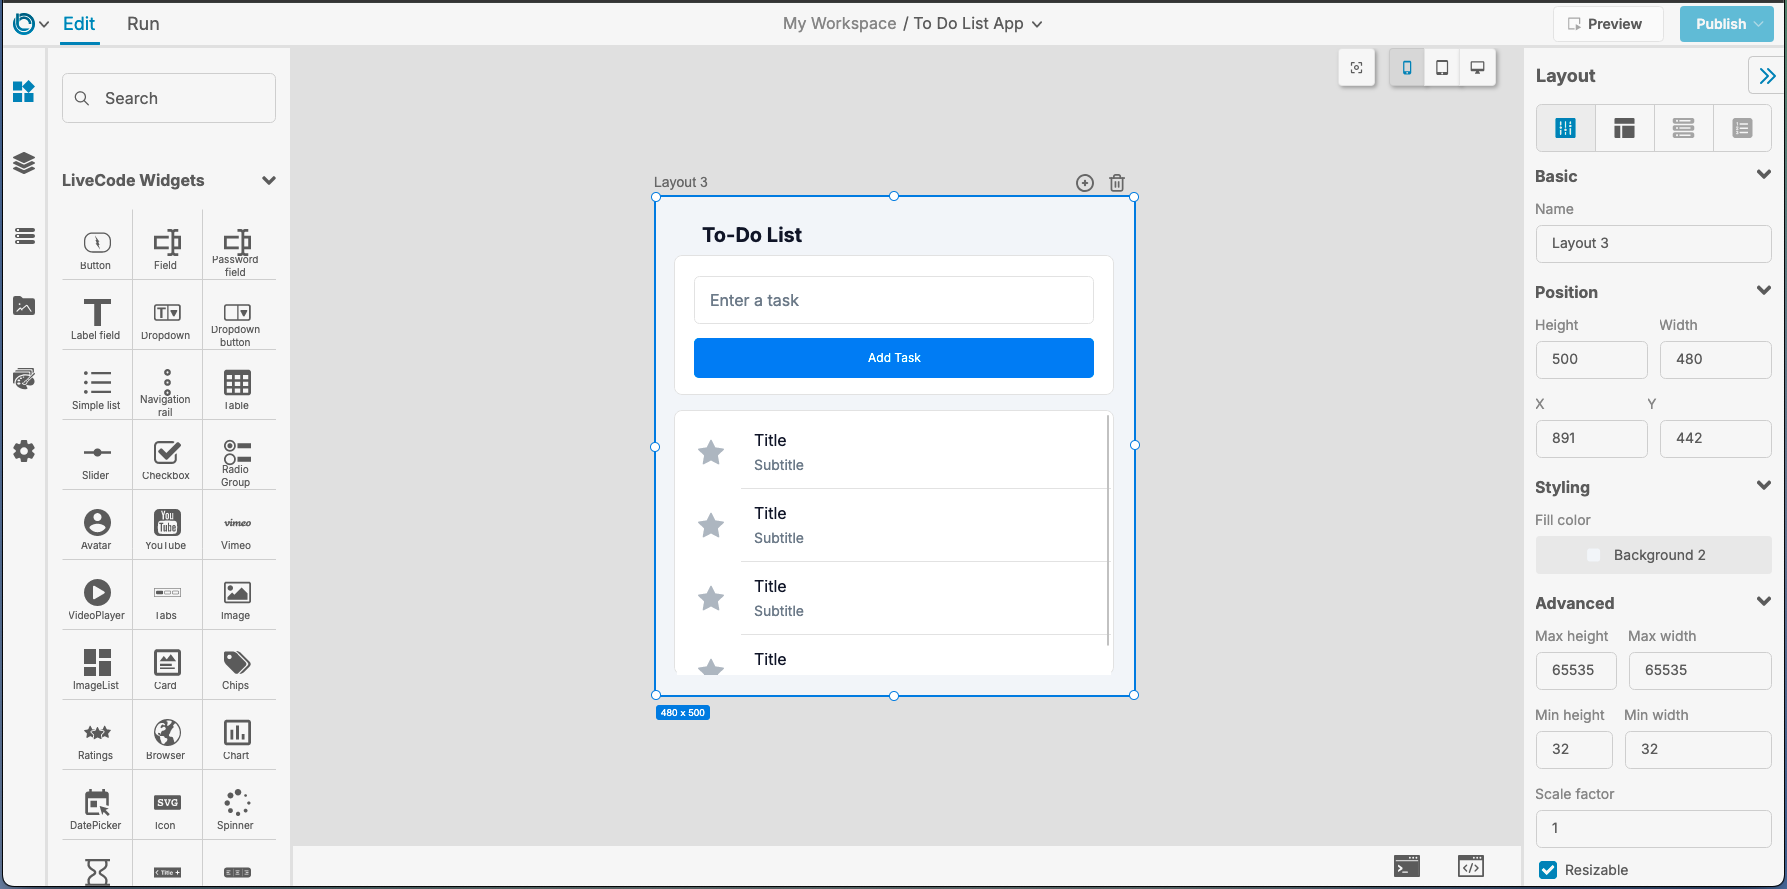
You create your app interface by dragging widgets and containers from the Tools Palette onto your layout. The Tools Palette can be accessed from the left-hand toolbar. Once you have added any widgets you want, you can adjust and customize them using the Property Inspector which is shown at the right-hand side of the screen.
-
Add a Header:
- Drag a Label Widget from the Tools Palette onto your layout.
- Use the Property Inspector to set the label text to “To-Do List” and adjust its font size.
-
Add an Input Field and Button:
- Drag a Text Field Widget for entering tasks onto your layout. Set its placeholder text to “Enter a task.”
- Drag a Button Widget next to the text field and set its label to “Add Task.”
-
Add a Simple List Widget:
- Drag a Simple List Widget below the input field and button. This will display the tasks in your list.
Step 3: Connect Data to Your App
The next step in creating your app will be adding a Collection to save and view data from.
-
Create a Collection:
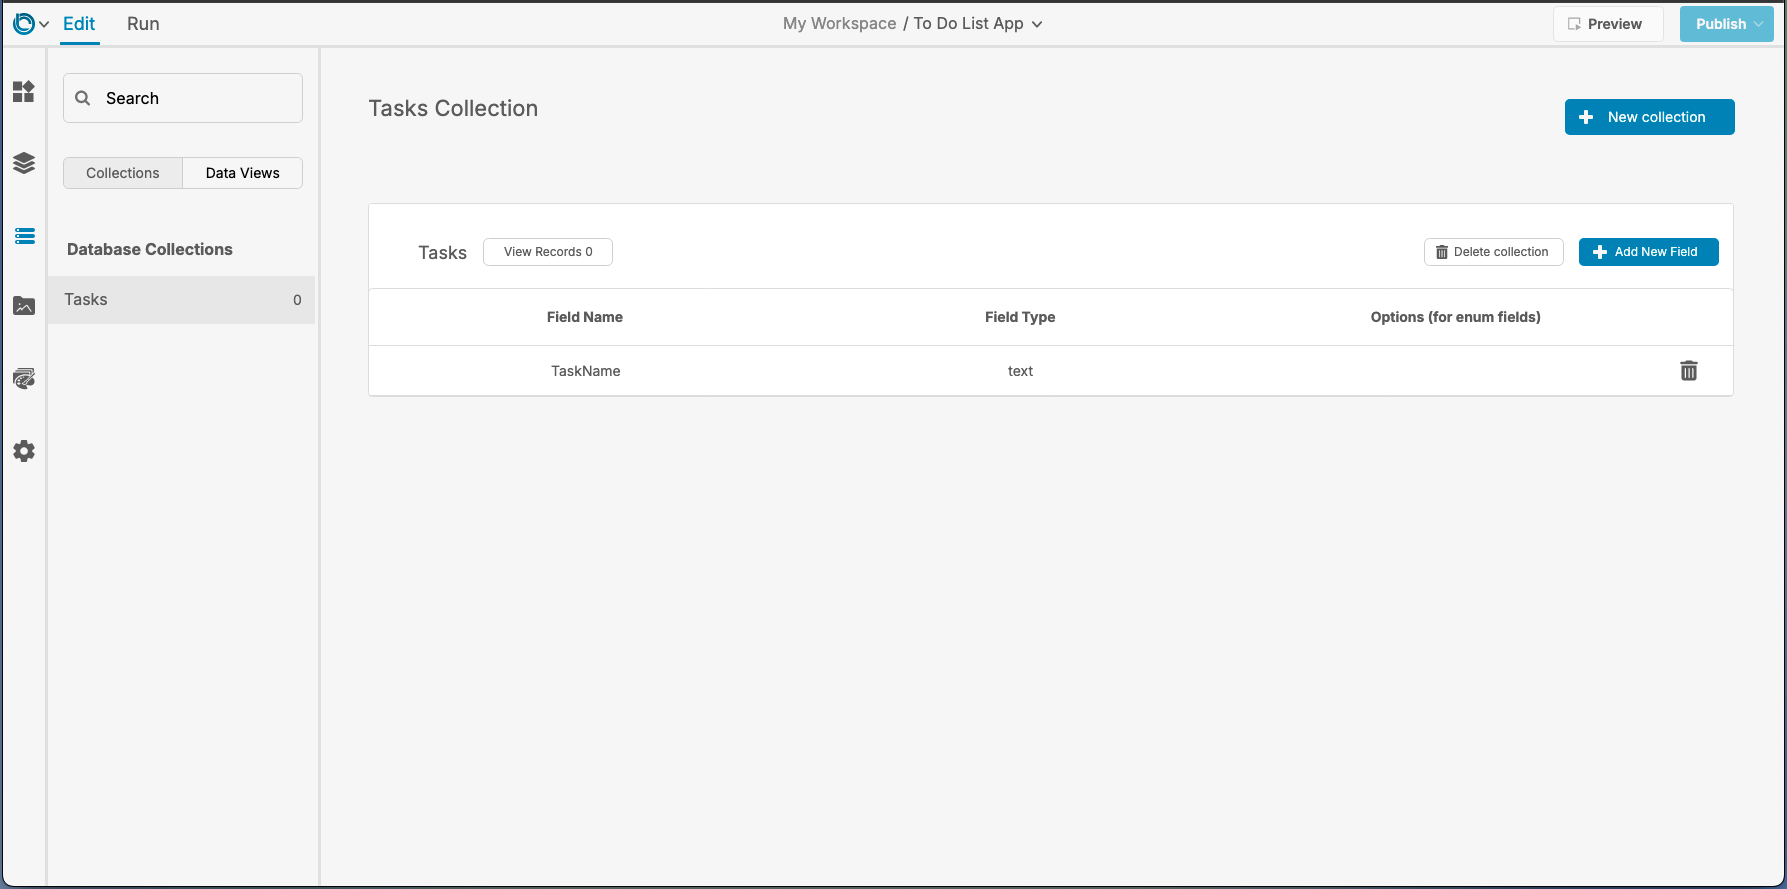
- Click the Data Tab in the left-hand toolbar.
- Create a new Collection named “Tasks.”
- Add a single field called “Task Name” (Text).
-
Bind the Simple List to the Collection:
- Return to the Canvas Area by clicking the Data Tab again.
- Select the Simple List Widget on your layout.
- In the Property Inspector, go to the Data Tab and bind the list to the “Tasks” collection.
- Map the “Task Name” field to the primary text of the list.
Step 4: Add Logic to the App
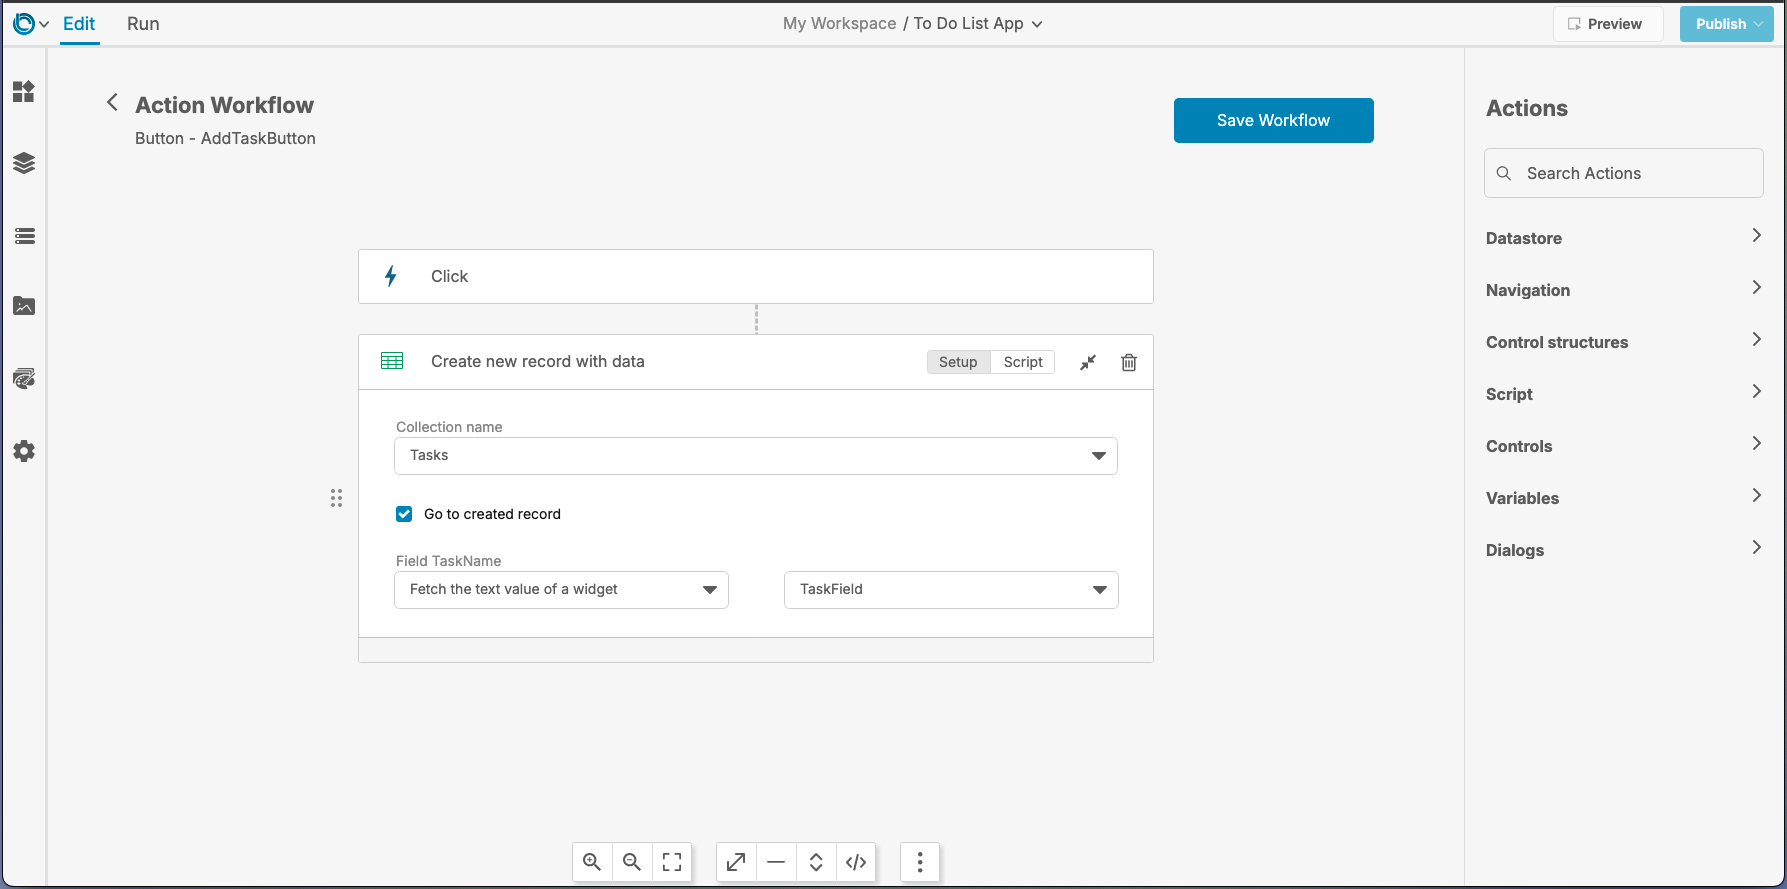
- Create an Action for the Add Task Button:
- Select the Add Task Button and open the Actions Tab in the Property Inspector.
- Create a new workflow:
- Set the trigger to
onMouseUp(when the button is clicked). - Add a Create new record with data Action Block:
- Target the “Tasks” collection.
- Bind the “Task Name” field to the text of the input field widget.
- Set the trigger to
Suggested Image: A screenshot of the Actions Workflow setup, showing the “Create New Record” and “Set Property” Action Blocks.
Step 5: Test Your App
-
Switch to Run Mode:
- Click the Run Button at the top of the IDE to test your app.
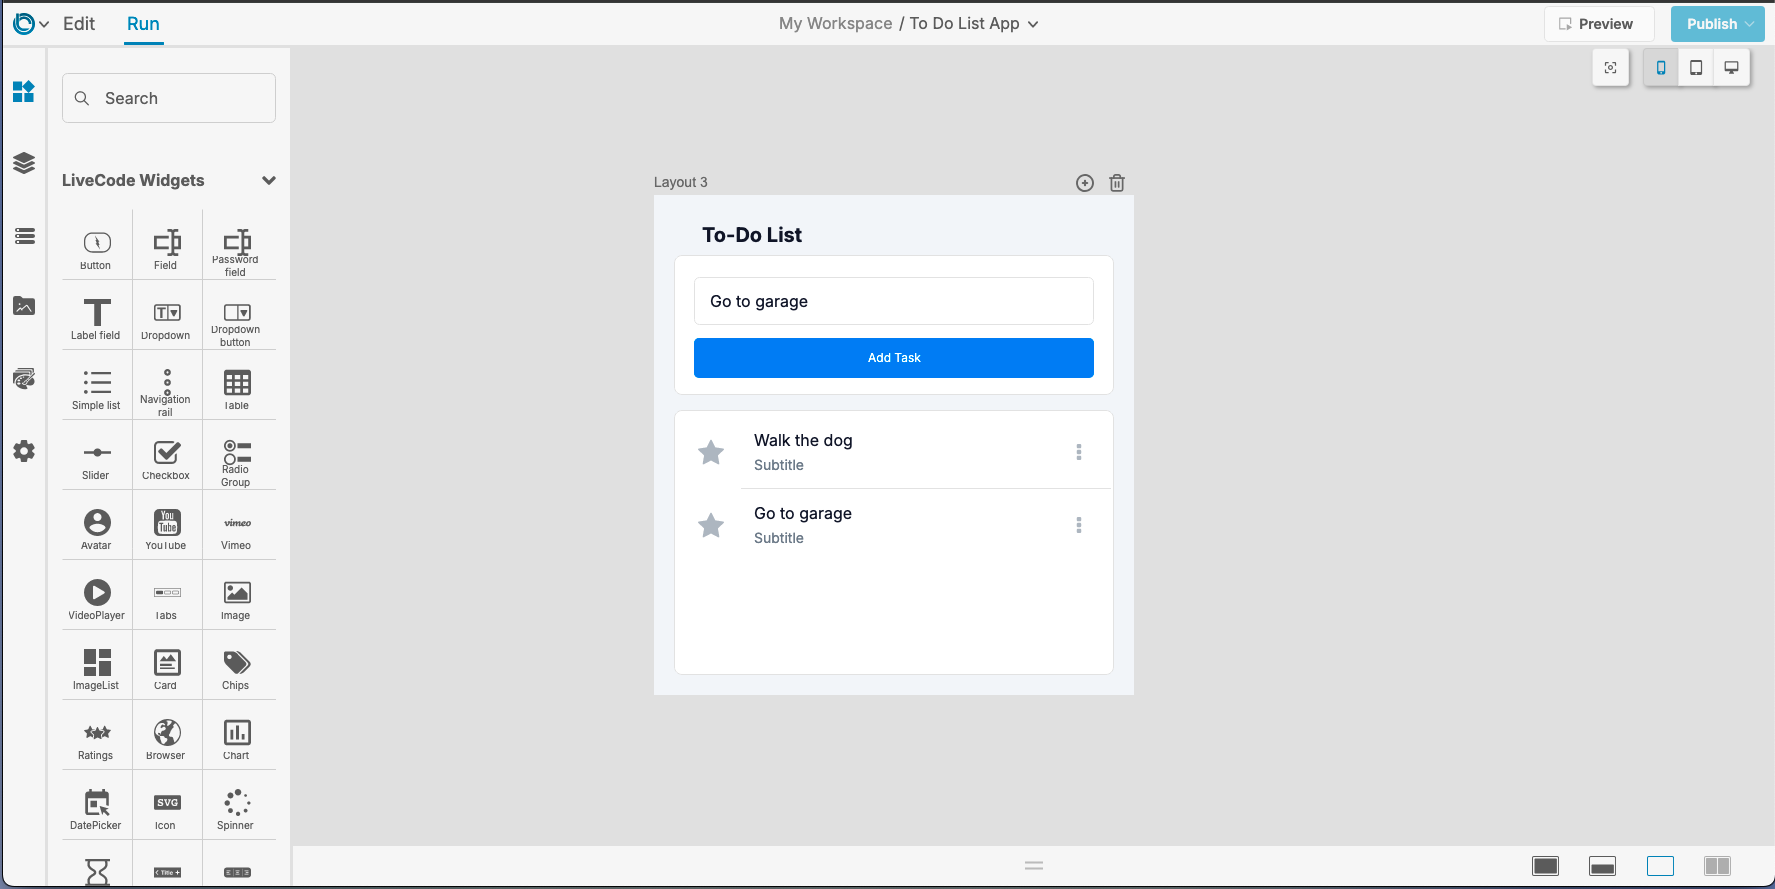
- Enter a task in the input field, click the "Add Task" button, and see it appear in the list.
-
Preview Your App:
- Use the Preview Button to test the app in a browser.
What’s Next?
Congratulations! You’ve built your first app in LiveCode Create. Here are some next steps to continue learning:
With LiveCode Create, the possibilities are endless. Experiment with widgets, add logic, and explore data integrations to build the app of your dreams.